

I've been making pendants using a bunch of found objects. It's so handy to know how to convert everyday things into hang-able charms. Feathers are a great example. There are a few techniques to choose from, but I like this one best because it's quick and easy, and also durable enough for jewelry projects.
You'll need just a few SUPPLIES:
- Fold-over cord end findings in gold or silver tone (I get mine from Rings and Things.)
- A few feathers, any sizes and colors
- Craft glue (I like The Ultimate from Crafter's Pick, available in hobby stores or online, because it's tacky, low toxicity, and dries clear and flexible.)
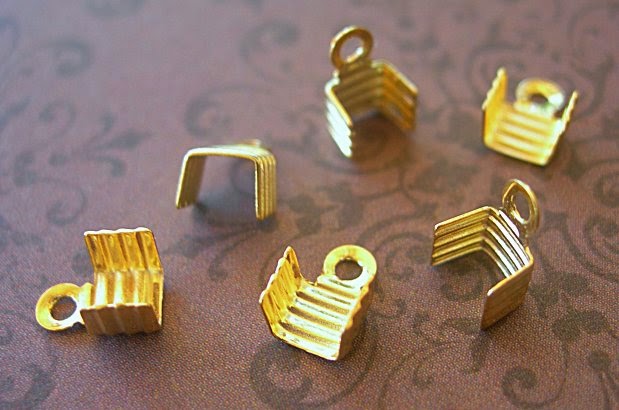 |
| Fold-over Cord Ends |
 |
| Clear drying, flexible craft glue |
- Craft knife, small sharp scissors, or a single-edge razor blade
- Wide flat-nosed jewelry pliers

STEP-BY-STEP
1. First, prepare the feathers. If the fluff goes all the way to the end, strip it off by pulling up the shaft on both sides. (You can put more than one feather inside the crimp, if the shaft is small.)

2. Before you glue, fold in one side of the finding. Don't fold in too much, though, or it will be too difficult to insert the feather and apply the glue. This little step makes it a lot easier to crimp the first side all the way down, while holding the feather and wet glue in place.

3. Next, lay the feather inside the finding with the end of the shaft sticking up past the top of the finding, so that it overlaps the hanging loop or even extends above it a little bit. (You'll trim this off later...)

4. Apply a bit of clear-drying craft glue inside the finding, covering the feather end. I usually squeeze out a dab of glue onto a piece of scrap paper, then pick up a small amount with a toothpick. If you apply too much, just wipe off the excess later, after you close the finding completely.
5. Holding the feather in place inside the finding, grab your pliers and fold the 1st side in by squeezing the pliers tightly, leaving the 2nd half unfolded for now.

6. To close the 2nd side, grasp it with the pliers and pull it inward toward the center, as you did with the 1st side. Then switch plier positions and squeeze the 2nd side down over the 1st side. Finally, squeeze very tightly across the whole finding to make it as flat as possible.
7. Wipe off any excess glue before it sets, then let the glue dry completely.
8. Once the glue is dry, use your razor blade or craft knife to slice off the end of the shaft that sticks up past the top of the cord end. This creates a clean, finished look.

This is such a quick and easy way to make feathers hang-able. I made the samples for this tutorial in less than 5 minutes! Try using foldover crimps with other things like leather strips, fabric, lace, or millinery flowers.

~~~~~~~~~~


