
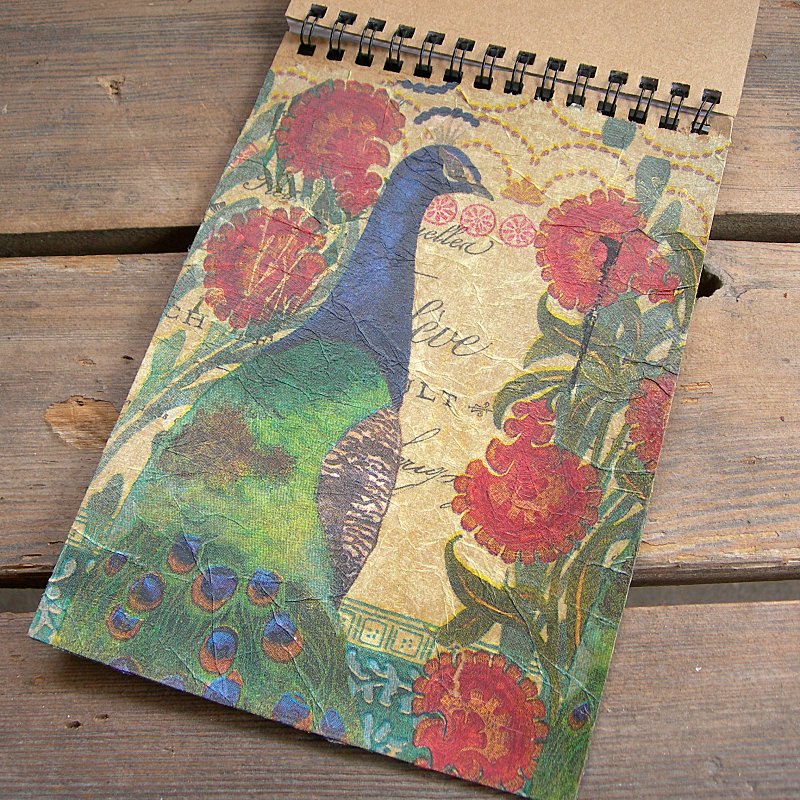
 Here's an easy way to decoupage a notebook with a couple of dollar store items and a few basic art supplies.
You'll Need:
- 1 paper or chipboard covered blank notebook
- 1 large printed paper napkin, split into layers
- Tinted decoupage medium, Mod Podge, or bookbinding glue
- Flat paintbrush or sponge brush, 1-2" wide
- Old plastic credit card or hotel room card
- Craft knife or single edge razor blade
- Sheet of printer paper or plain scrap paper
- Metallic rubber stamping ink
- Rubber stamp to coordinate with napkin paper
- Pencil
- Damp paper towel
 |
| Tools and supplies you'll need for this project |
1. Unfold a napkin and split the layers apart. Discard the white layer and save only the printed layer. This thin layer will become semi-transparent when you apply the glue, and blend with the notebook color.
 |
| Discard all but the printed layer of the napkin. |
2. Position the napkin wherever you want it on the cover. With your pencil, lightly mark the corners and sides of the cover on your napkin. Set it aside -- don't cut it yet.
3. Open the notebook so that you're only working with the front cover. Apply an even layer of the decoupage medium to the entire cover, all the way to the edges. Work quickly or the medium will soak in.
 |
| Open the notebook while working, but don't trim the edges yet! |
4. Grab the napkin and, using the pencil marks as a guide, lay it down onto the cover. Spread it out. Don't worry if you get a few wrinkles and tears, the decoupage medium will darken and "age" those areas. Gently dab the napkin down onto the cover until it's pretty flat.
 |
| Wrinkled and torn is ok! |
5. Here's how to burnish down the napkin -- lay your white paper on top of the wet cover, and, using a long edge of your old credit card to press out the excess medium. Start in the middle and burnish out toward each edge. Repeat, starting in the center and scraping out in a different direction each time. Clean up any extra medium with a slightly damp paper towel.
 |
| Burnish from the center out to the edges with an old credit card. Trim with a single edge razor or your favorite craft knife. |
6. Set aside the white paper cover and let the cover dry completely. You will probably have extra napkin hanging over the edges. Resist the temptation to trim the edges!
7. Once the first coat is dry, apply another thin coat. It will protect the napkin. Dab up any extra and let dry completely again.
Don't be alarmed if your cover warps. It should flatten when dry, but if not, you can press it until a big book later.
8. Now you're ready to trim the excess napkin. Turn the notebook over and, using your razor or craft knife, trim carefully right along the edge. If you burnished well, the edges should be completely glued down. If not, just touch it up with a little more medium.
9. I like to add more napkin scraps here and there, and a little more medium to give the piece an aged look. Don't add too much more moisture though, or your cover could start to fall apart.
10. I always like to add a metallic touch, so in this example I stamped a leaf-and-stem motif with fast-drying gold Delicata ink.
 |
| Delicata metallic inks dry faster than pigment inks. |
~~~~~
No comments:
Post a Comment
Thanks for your comment! It will be reviewed and posted ASAP.